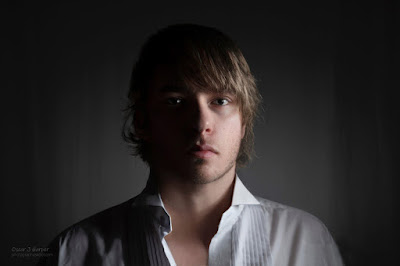
Socrates

"The only true wisdom is in knowing you know nothing." 

Socrates

"To find yourself, think for yourself."

Nelson Mandela

"Education is the most powerful weapon which you can use to change the world."

Jim Rohn

"Success is nothing more than a few simple disciplines, practiced every day." 

Buddha

"The mind is everything. What you think, you become." 

Tuesday, 21 March 2023

Why is editing an important part of filmmaking?

Editors are part creatives and part technicians. 

We need  a comprehensive understanding of the industry standard editing softwares. 

These include 

Adobe Premiere Pro vs. Final Cut Pro, and 

Da Vinci Resolve.


Narrative continuity: 

Film editing is the art of connecting shots, scenes, and sequences to pull a movie’s story together. Shot length, camera angle emphasis, scene order and transitions, and sound design all impact viewer experience. 

https://www.youtube.com/watch?v=33eWqDZ6sRc&pp=ygUWTmFycmF0aXZlIGNvbnRpbnVpdHk6IA%3D%3D

An editor could be selecting and cleaning up the best footage, placing it in the right order, and matching it with the right audio and soundtrack, editors also give a rhythm to a movie’s progression. 


Tone:

 Editing in film is also used as a visual language. The editor creates emotional meaning. Even seemingly small decisions in the editing room—such as using sharp, short cuts instead of leaving in long, unbroken shots—influences a scene’s tone. Some editing decisions can change the entire feeling of a film. 


Mediation: 

An editor can also be a mediator between the different departments of a film and contribute their own creative ideas throughout the filmmaking process. 


Learn the intentions of different cuts and transitions

Use the cuts intentionally in your editing. 

  1. Use a smash cut to emphasis a shocking moment. 
  2. Use L-cuts and J-cuts to make conversations flow naturally. Use insert shots to give the audience vital information without wordy exposition. 

Match the editing to the film's tone: 

The editing made for a film directed toward crafting its overall narrative. 

For example, an action movie such as “John Wick” is edited to be fast and fluid, while a period drama such as “There Will Be Blood” is slow and weighty.

The editing gives appropriate  tone of the film. 

Study acting

A great video editor can understand the components of a great performance. Often, he will be building scenes from multiple takes

Be original: 

Good editing can also mean assembling a film in an unconventional way that mixes up the structure. Editing can also be used to create a distinct visual style and identity for a film. Think of “Birdman or (The Unexpected Virtue of Ignorance),” which was made to look like a single, uncut shot. 

Be evocative

 Film editors must also be well versed in technical elements such as film segments, shots and camera movements, cuts, and continuity. 

Momentary editing: 

This is the basic shot placement, cuts, dialogue flow, action, and continuity within scenes.

Structural editing Structural editing

This is the big picture of the film, which includes pacing, scene order, sequences, and plot movements.

Segments of a film

Editing a film is the process of building up bits and pieces until you’re eventually left with a complete project. Here are the building blocks used by film editors:

  • Shot: A continuous piece of footage between cuts.
  • Scene: The basic storytelling unit of a film, scenes are compositions of shots and audio in a singular space and time. 
  • Sequence: A distinct narrative segment of a film that is made up of multiple related scenes—
  • Act: One of the major blocks of a film that encompasses multiple sequences. Many films follow a three-act structure that includes common elements of storytelling, such as a climax in the third act followed by a resolution and falling action.

Shots and camera movementsEven though camera work isn’t the editor’s direct responsibility, they should know the basics. Learning about the art of cinematography—especially the different kinds of shots and camera movements—is essential for knowing how to make a balanced edit.

Cuts:  In the video editing process, a cut refers to the shift from one clip to another. The term “cutting” came from the era when all movies were cut and spliced together on reels of physical film. Today, the majority of editing is done in digital programs such as Adobe Premiere Pro and Final Cut Pro. A few different kinds of cuts include

Standard/hard cut: A simple transition from one shot to another that’s most commonly used within scenes.

Smash cut: A sharp, snap change of one scene to another that emphasizes two contrasting elements. This cut is usually used to highlight a particular story beat, such as a punch line to a joke in a comedy or a way to release a tense moment in a horror or action movie. 

Split editA deliberate mismatch of video and audio between scenes. Either the audio from the next scene begins before the video (a J-cut) or the video proceeds the audio (an L-cut)

Cutaway: This is when an editor embeds a shot from a different time and space into a scene as a way of introducing new information or story beats. 

MontageThe French word for “assembly,” a montage is an arrangement of short clips into a continuous sequence. Montages are typically set to music or narration and convey a lot of narrative information in a brief segment of the film. 

A cut can also mean one of the different versions of a film. Among the different kinds are:

The assembly cutthe editor’s first version of the project.

The rough cut: an unfinished version of the project that implements notes and tweaks from the director but still includes temp sound, music, and VFX, as well as scenes that will ultimately be trimmed or cut from 

the Final cut: the version of the project that is locked with finished music and VFX

ContinuityOne of an editor’s primary duties is maintaining continuity, or consistency of time and space within the film. 

In the shot-to-shot sense, continuity means that the visual and audio elements line up. For example, if a character is standing in a corner and holding a prop in one shot, they should be in the same position in the next, unless an action has occurred. Audio, like dialogue or diegetic sounds (sounds that originate within the world of the film), should also flow between shots.


Plot continuity is arguably even more important than visual and audio continuity. 

During the video editing process, a lot may be left on the cutting room floor. Shots, scenes, and entire characters might be trimmed out depending on what the director, producers, and studio decide. As a result, the film’s editor has to keep a sharp eye on the setup and payoff of plot points.


Types Of Transitions In Film

 https://www.musicgateway.com/blog/how-to/film-transition

Different types of transitions in film are a vital part of the filmmaking process. 


Film transitions are extremely important in film, as they can 

  1. help to set the mood or tone of a scene. 
  2. and help to signify to the audience the passing of a certain amount of time or to separate out parts of the narrative. 

Types Of Transitions In Film

In this section of the article, we will detail the main types of transitions in film. 

They are techniques that are used to combine shots in film. This can be achieved during the filming, or editing process. Film transitions are extremely important in film, as they can help to set the mood or tone of a scene. 

The Dissolve 

The dissolve is a film transition editing technique. It gives the impression of one video clip dissolving into the next one that appears on screen. 

The quick dissolves convey action and life, and the slower dissolves are used to create an atmosphere of despair.  

The Cutaway 

cutaway is a shot that “cuts away” from the main action to show supporting information – then returns to the main shot to reinforce that information. Cutaways can be used to transport us to a different time and place in order to confirm something that a character said. Cutaways can also be used to show something happening in the same scene as the main action 

A cutaway shot is a supplementary shot that “cuts away” from the main action to indicate something else in the space, such as an object or location. Cutaway shots enrich the story and are a great way to show essential elements of the story instead of telling them to the audience through exposition.

The Wipe 

It will be easier here to break up the different transition techniques that the wipe can offer. 

There’s the iris wipe (the shape of a circle), matrix wipe (the pattern of shapes), clock wipe (rotating the shape in clock hands), heart wipe (the shape of a heart) and the invisible wipe (the use of walls to cover cut). 

The two most commonly used are the natural wipe and the iris wipe. 

The natural wipe is pretty self-explanatory, as the aim of the transition is to be as seamless as possible for the audience. 

The iris wipe is used to focus on the cemental subject while cropping out the majority of the rest of the frame. 

The Fade 

This is one of the most common types of transitions in film. It’s typically used to signify the beginning or ending of a scene. 

It’s a popular transition technique for filmmakers who are fading to black or white.  

The L Cut & J Cut 

Let’s begin with the L Cut. This type of film transition technique is also known as a split edit, and it’s a film technique that’s been around since the analog filming days.

Put simply, it’s when the sound of the scene of a film transitions over to the next scene (or shot) despite the fact the sound no longer matches the video. These types of edits are great for portraying conversions between characters.


Match Cut 

A match cut is an edit in cinematography that uses elements of one scene in the transition to the next scene. The purpose is to create a visual match for different scenes that are not inherently linked, like scenes set in different locations, by having a second shot that — in some way — mirrors the first.A match cut uses two similar shapes, sounds, outlines, or actions to seamlessly cut from one image to another. 

It’s useful for when you are doing something in one shot, and you know that your next shot is going to involve something moving in the same direction or the same position in the frame as the one previous,
Match cutting doesn’t have to be just for movement. It can also be used to illustrate the passage of time, as in a montage. Or it can also be used to connect similar shapes with the same frame composition

Jump Cut 

French illusionist and filmmaker Georges Méliès is credited as the “inventor” of the jump cut after accidentally discovering the effect in the late 1800s.

Jump cuts are used in editing to purposefully break the rules of continuity to emphasize a point, elicit an emotional reaction from the audience, or avoid monotony, especially when depicting the passage of time.

Emphasizing changing mental states

There are various methods that can be used to highlight a character’s mood; a jump cut is an extremely effective way to illustrate how quickly someone goes from joy to sorrow, or across another range of emotions and/or mental states. Increasing confusion, nervousness, or showing an unpleasant mood without lingering too long is one benefit of this tool. 

Elevating tension

A jump cut can push the terror closer to the camera without giving the viewer a chance to look away, heightening an unsettling atmosphere.

Adding special effects

This is a tried and tested way to increase scares by removing or adding something to the frame, as it’s disquieting for both characters and audiences


Jump cuts are often meant to disorient or surprise, if used incorrectly or inappropriately, they can be distracting. While a jump cut is far from the only tool in the video editor’s arsenal, there is a time and place for the technique.

Define continuity editing.

Continuity editing is an editing system used to maintain consistency of both time and space in the film. Continuity editing helps ground audiences in the reality of the film while establishing a clear and structured narrative.

The goal of continuity editing is to make the mechanisms of filmmaking invisible as to help the audience dismiss disbelief more easily.

.

Crosscut

Cross cuts go back and forth between two shots that are happening at the same time in order to build scale, continuity and or tension. Christopher Nolan does an amazing job of using cross cuts in movies like Memento and Interstellar. Let’s take a look at a video that explores the art of Nolan's cross-cutting.

“Making it in this business, means making sure you have everything you need to succeed.”
W

Monday, 20 March 2023

cell phone photography

Photography is more than just taking a picture. It is an outlet for creativity, vision, and imagination. 

It can give you a sense of purpose, a mode of storytelling, and a different perspective on things. It can even take you to new places and help you meet new people. 

Smartphone photography is different from digital photography using a camera because it is so instant and accessible.


 Smartphone photography is taking pictures with your phone. It could be an iPhone or Android, old or new

Instagram, a photo and video sharing app, has over 95 million photos uploaded to it every day! 


The Basics of Smart Phone Photography


Three Photography Basics 


1. Clean your phone's lens

Make sure your camera lenses are clear!  Ensuring they are dust and smudge free will result in a clear picture. You can do this by using a microfiber cloth and/or a lens wipe before taking a photo. 

2. Turn on the Grid. 

One of the easiest and best ways to improve your mobile photos is to turn on the camera's gridlines. According to this theory, if you place points of interest in these intersections or along the lines, your photo will be more balanced, level, and allow viewers to interact with it more naturally.   You can turn on this option in the camera settings. 


3. Set your camera's focus.

Today's phone cameras automatically focus on the foreground of your frame. To adjust where you want your camera lens to focus, open your camera app and tap the screen where you want to sharpen the view. A square or circular icon should then appear on your camera screen, shifting the focus of your shot to all of the content inside that icon.

 4. HDR. 

HDR stands for High Dynamic Range. High dynamic range or HDR, is a camera app feature that helps balance the light and dark elements in a high-contrast photo. It can be used to give photos a more creative, or artsy vibe, but it is commonly used to produce an image that looks similar to how you see it with your eyes.  It is a setting you can turn on or off. When turned on, the camera takes 3 photos at different exposures and combines them into 1 photo. 

This could be used for photographing landscapes, sunlight portraits, and lowlight/backlit scenes. It should be avoided for movement shots, high-contrast scenes, and vivid colors.


SHOT COMPOSITION: 

Rule of Thirds, Rule of Thirds Using the grid breaks up the frame into thirds horizontally or vertically. 

Leading Lines, 

Perspective 


1. 


2. 

Use leading lines.

When we look at a photo, our eyes can wander all around the frame. When there are leading lines, our eyes are drawn to the lines and what they lead to. Leading lines can be found in the city through streets and buildings, and in nature with mountains, reflections, pathways, etc. as seen in the photos below. 

Leading lines are great for creating a sense of depth in an image, and can make your photo look purposefully designed — even if you just happened to come upon a really cool shape by accident.


3. Perspective

 To create a sense of depth, you can use a few techniques: 

Find different perspectives.

Taking photos from a unique, unexpected angle can make them more memorable — it tends to create an illusion of depth or height with the subjects. It also makes the image stand out, since most mobile photos are taken either straight -on or from a bird's eye view.

Try taking a photo directly upward and playing with the sky as negative space, like in the first photo below. Or, you can try taking it at a slight down.

  1. • Low angle shot - the camera is placed lower to the ground than the subject, and you are shooting up at it. 
  2. • High angle shot - the subject looks smaller because you are shooting above it, looking down. 
  3. • Lateral movement - you move to the left or right of a subject to get a better angle. 


  1. • First-person point of view - as if you were peeking out of the tree. Those few leaves would be blurry, and your landscape would be in focus. 
  • Zoom – This refers to making a subject looker closer or farther away in an image. 
  • Optical zoom involves the use of a lens that physically extends from the camera to magnify a subject, achieving the same effect as if you moved closer. There is no loss of quality using this. 
 For Android phones, check with your particular model.

 • Digital zoom increases the size of the image, cropping the edges. This results in a poor image quality. If the zoom-in is small, the image quality may not really be affected. It is when a subject is far away and the more you zoom in, the more image quality drops. 

 Golden Hour – Use natural light.

It's hard to find a great smartphone photo that was taken with a flash. Most of the time, they make a photo look overexposed, negatively altering colors and making human subjects look washed out.

Take advantage of the sources of natural light you can find, even after dark. This gives you a chance to play with shadows, like in the second image below, or create a silhouette with other ambient sources of light, like traffic and surrounding buildings.  Considered a great time to shoot photos, golden hour is the first hour of light after sunrise, and the last hour of light before sunset. The natural light is softer and redder, and there are no sharp shadows as there would be with overhead sunlight. 

This light is popular for selfies and silhouette photos. 


Focus on one subject.

Many of the best photos include just one, interesting subject. So when taking a picture of one, spend some extra time setting up the shot. Some professional photographers say that the subject shouldn't fill the entire frame, and that two-thirds of the photo should be negative space — that helps the subject stand out even more.

But be sure you tap the screen of your smartphone to focus the camera on your subject — that'll help to ensure that it's focused and the lighting is oMacro Photography – This is extreme, close up photography. It is great for photographing the details of nature (bugs, plants, small animals), and capturing the texture of larger objects. You can buy separate lenses for your phone for this, or you can just get really close (a few inches away) and focus on your subject. 

Hold your phone still.

While smartphones have given us the benefit of taking photos on the go, the cameras on our phones are still sensitive to movement. To help avoid blurry or warped photos, steady your camera first.

You can lean on a friend or wall to prevent your arms or hands from wobbling, or prop your phone up using books or similar objects to steady your phone

 Photo editing apps let you shoot, edit, organize, and share your photos. There are hundreds out there.


There are websites where you can post your pictures online for yourself or to share. You can make albums, send out links, and store photos all on a photo hosting site. 


Jamie Spencer at Make a Website Hub reviewed 13 free image hosting sites5 if you want to share a photo or gallery with friends, family, the Internet, etc. 


Accessories – If you want to spend the money, you can purchase extras to enhance your photography experience. Some things include a tripod to keep the camera steady, lenses that clip onto the phone for better zoom shots, 


a remote shutter control that lets you take a picture when you are standing away from the phone, microfiber cloths to keep your lens clean, and LED lights for better lighting. 

Consider buying a mobile tripod.

Although mobile devices make it easy to snap any photo on the go, there's never been an easy way to ensure the shot stays level and balanced when you shoot — especially if you want to be in the picture and not just take a typical selfie with your extended arm.

Embrace negative space.

"Negative space" simply refers to the areas around and between the subjects of an image — and it can take a photo from "good" to "great."

When you include a lot of empty space in a photo, your subject will stand out more and evoke a stronger reaction from your viewer. And w

Activity • 

  • Focus on something using the exposure settings to adjust how much light is allowed in. 
  •  Play with the zoom feature! Walk up to something and take a picture. Then walk away and zoom in and take another picture of the same thing. 
  • Compare the two for image quality. 
  •  Best Photo Apps of 2020. Pixpa. https://www.pixpa.com/blog/photo-apps 5 Spencer, J. (n.d . Best Free Image Hosting Sites Guide For 2020. 
  • Make a Website Hub. https://makeawebsitehub.com/free-photo-hosting/ 
  • Get up close and personal with a macro shot! Photography is an art that is learned. Get some inspiration by using a Google image search, look up photography styles, or search for the concepts learned in this program and look to the images. 
  • Get to know your phone camera and the built-in photo editor! You will learn what your phone is capable of and will understand how external editing apps may help. 
  • Start your journey at home! Move things around and set up your shot to practice the concepts we covered. 

https://lacountylibrary.org/wp-content/uploads/2020/05/DIY-Library-Program-Phone-Photography.pdf


https://agrilife.org/bell4h/files/2017/01/1-Photography-101-Updated-Jan-2017.pdf

Thursday, 2 March 2023

Lighting Techniques -Aspects of Portrait Photography


There are many aspects of portrait photography that will help

 set the mood and allow dramatic

1) Split Lighting

2) Rembrandt Lighting

3) Butterfly Lighting

4) Loop Lighting

5) Flat Lighting


1) Split Lighting

With split lighting, the face is basically split  in half with one side shadowed and the other side with light. Split lighting offers a dramatic effect to an image.


To achieve the split lighting effect, place your light source (studio light, window light, sunlight etc) 90 degrees to the left or right of the subject.

 The line separating light and shadow will be down the middle of the nose and chin. 


2) Loop Lighting 

Loop lighting is one of the most flattering lighting effects for any subject. Loop lighting is created when a small shadow of light (slightly loop  shaped) is formed on the side/slightly under the subjects  nose. The shadow does not appear directly under the nose, but slightly on the side, reaching in toward the side of the face. It can be small and subtle or can stretch all the way down to the corner of the mouth. Below is one example of loop lighting: 


To create loop lighting, the main light is positioned 30-45 degrees from the camera around the subject's side. The light source should be higher than eye level and pointing down toward the subject's face in the direction they are facing. 

An additional light source (fill light) or reflector can also be aimed at the darker side of the face to ease the shadows. Be sure to not place your reflectors down low angle up. This will result in an unflattering effect. 


3) Rembrandt Lighting

Rembrandt lighting is achieved by creating a triangle of light on the cheek. Rembrandt lighting is more dramatic (similar to split lighting) and creates a moody, darker feel to the portrait. The more shadow we add to our subject and the more we turn our light away from flat lighting, the more dramatic our lighting becomes! Below is an example of Rembrandt lighting: 


To create Rembrandt, lighting, the subject should be turned slightly away from the light. The light should be above the top of the head. Move your main light around the subject until the shadow of the nose is touching the shadow of the face. This should leave on side of the face in shadow but keeps a triangle of light on the cheekbone and eye. 


4) Butterfly Lighting

Butterfly lighting creates a shadow under the nose that resembles a butterfly! Butterfly lighting is also known as Paramount Lighting  named after classic Hollywood glamour style photography.

Below is an example of butterfly lighting: 


To achieve butterfly lighting, place the main light source directly behind the camera and slightly above the subject's head. The photographer will be shooting underneath the light source. You may need to place a reflector directly under the subject's chin (or the subject can hold it under his/her chin if necessary). This light pattern is a little more difficult to create using window light or a reflector alone. A harder source of light like the sun or a flash is usually needed to achieve this look. Butterfly lighting will create shadows under the cheeks and chin. Butterfly lighting isgreat for older subjects because it tends to minimize wrinkles! 


5) Flat Lighting

Flat lighting is the least dramatic of all the lighting patterns because it casts the least amount of shadows on the subject's face. Flat lighting is used mainly for headshots and glamour editorial  type shots because it minimizes the amount of wrinkles and imperfections. Below is an example of flat lighting: 


To achieve flat lighting, place your main light in front of the subject in the same direction where you will be shooting.